Dujiaoka
To integrate imsafu payment with Dujiaoka, you need to have basic knowledge of server operations. However, there's no need to worry as you can simply follow the instructions in the tutorial step by step.
Preparation
Please make sure to correctly install Dujiaoka according to their official tutorial. This tutorial will provide guidance based on the installation using the Baota panel.
Plugin Download
Please click imsafu-dujiaoka-v1.0.0.zip to download the plugin and extract it.
Plugin Upload and Configuration
Log in to the Baota panel backend, click on "Website" in the left main menu, and then enter the "Root Directory" of the Dujiaoka website.

Go to the directory
/app/Http/Controllers/Payand uploadImsafuController.phpto that directory.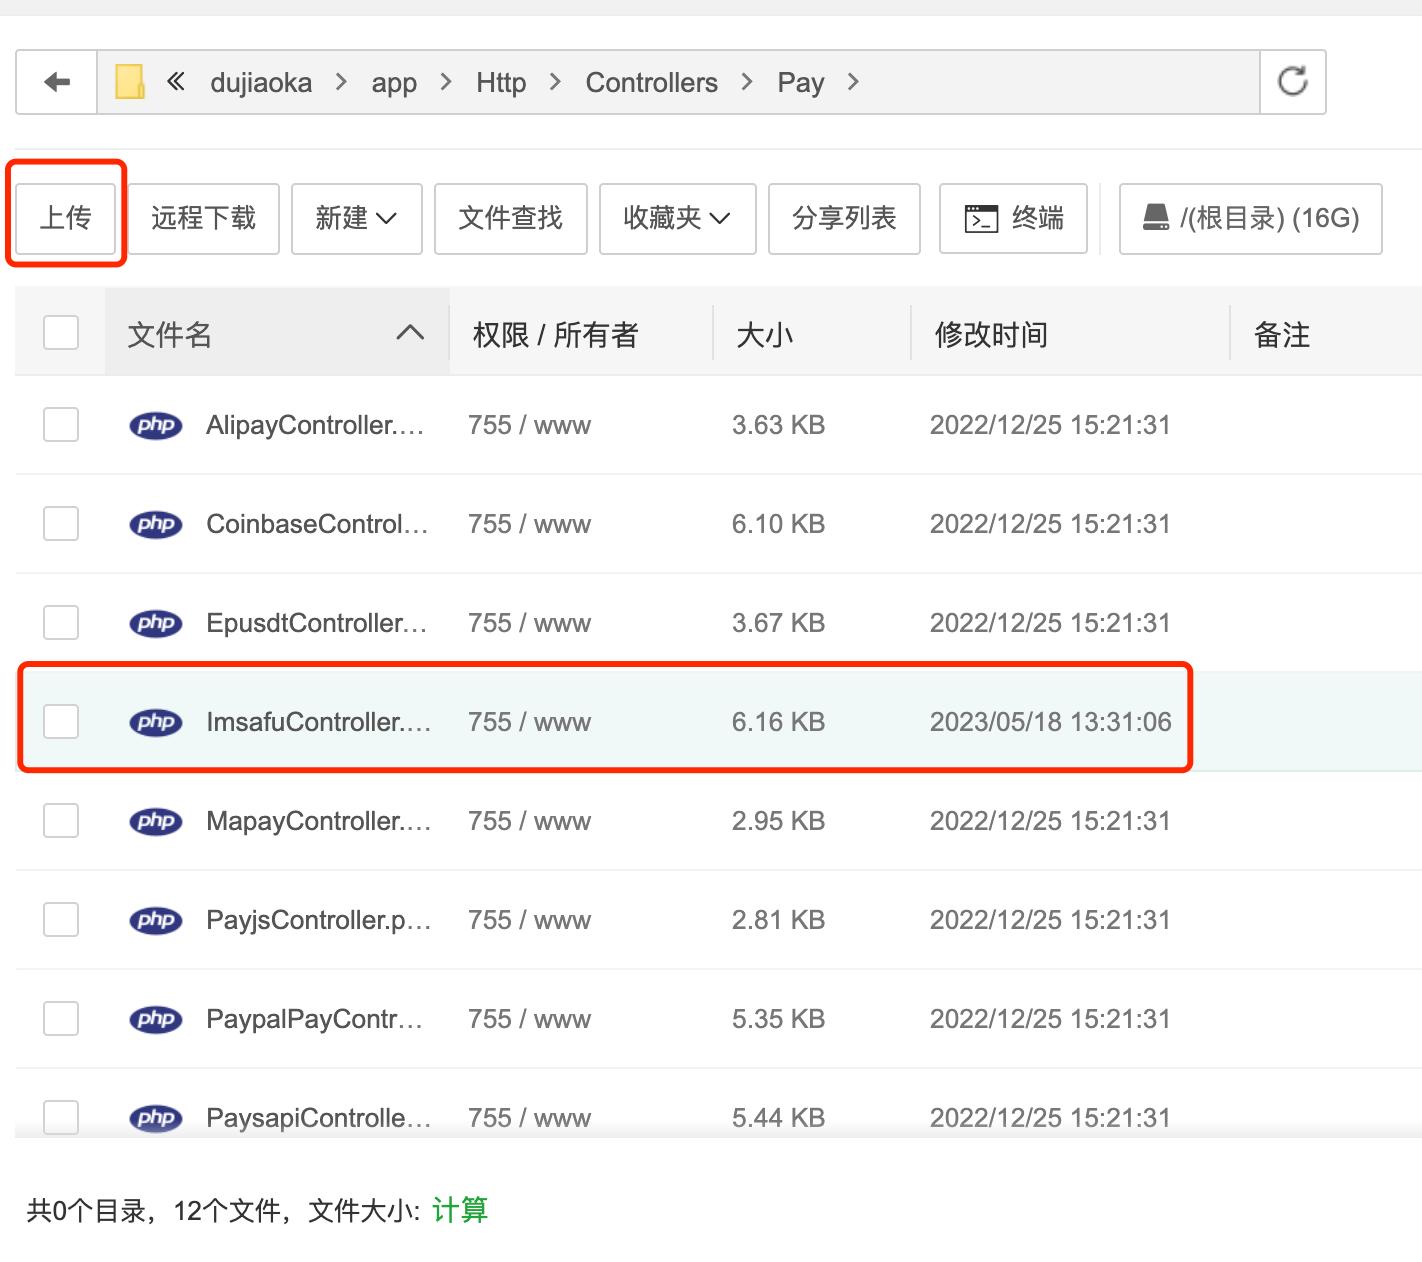
Then go to the directory
/routes/commonand double-click onpay.phpto edit it.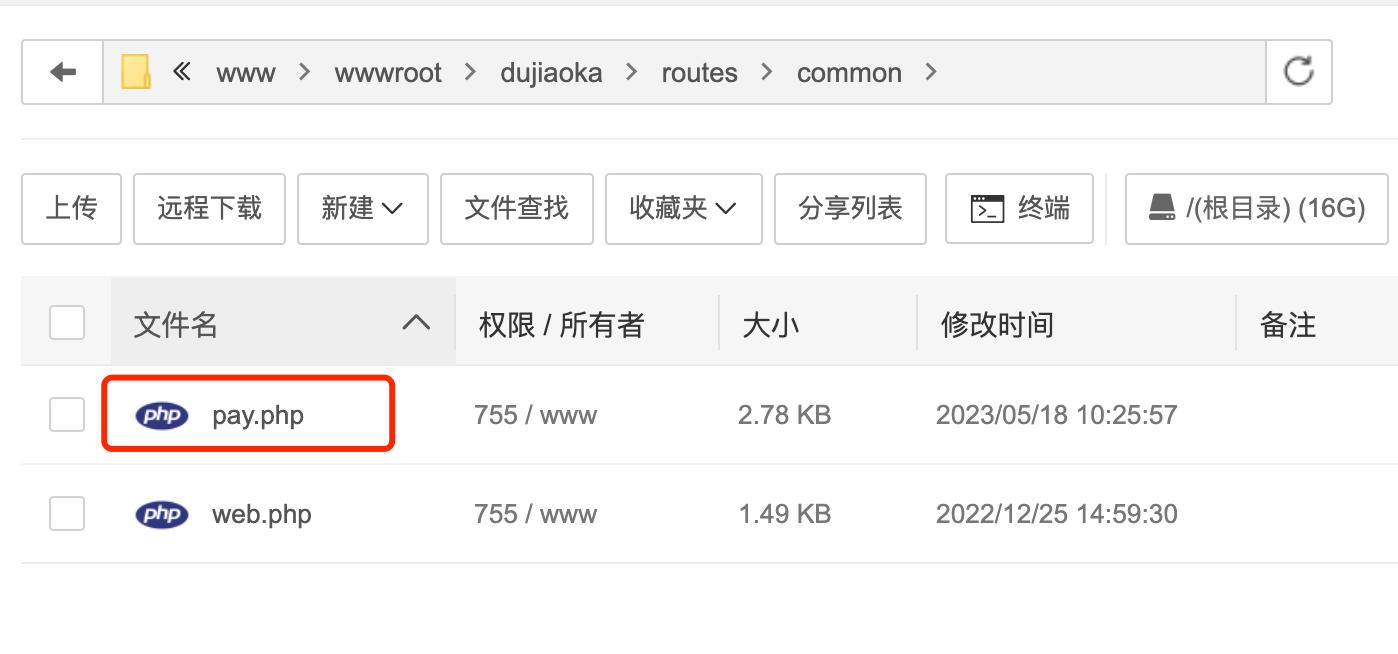
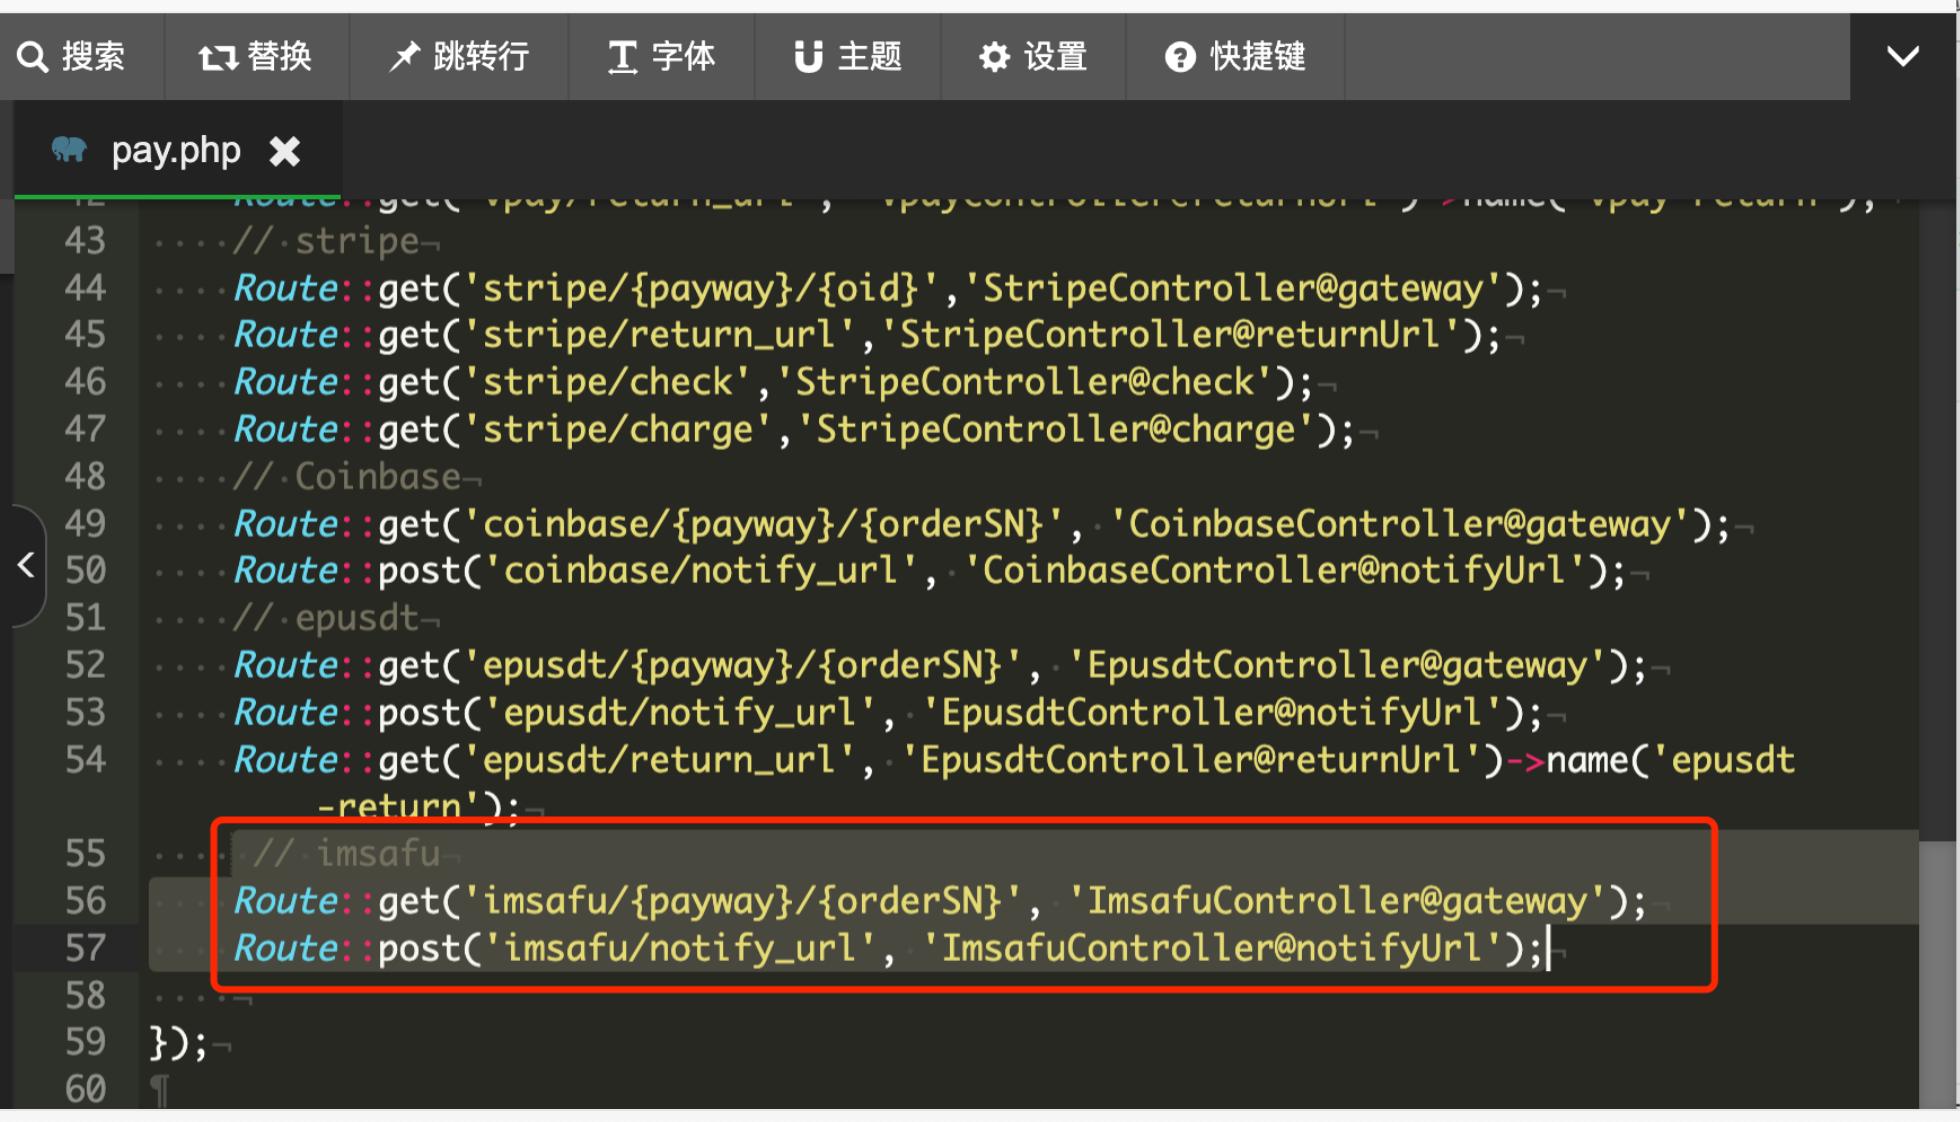
Please paste the following code at the location shown in the screenshot and click on Save.
// imsafu
Route::get('imsafu/{payway}/{orderSN}', 'ImsafuController@gateway');
Route::post('imsafu/notify_url', 'ImsafuController@notifyUrl');
Dujiaoka Backend Configuration
In the left menu, go to "Configuration" -> "Payment Configuration" plugin, and then click the "+ New" button in the upper right corner to add a payment method.
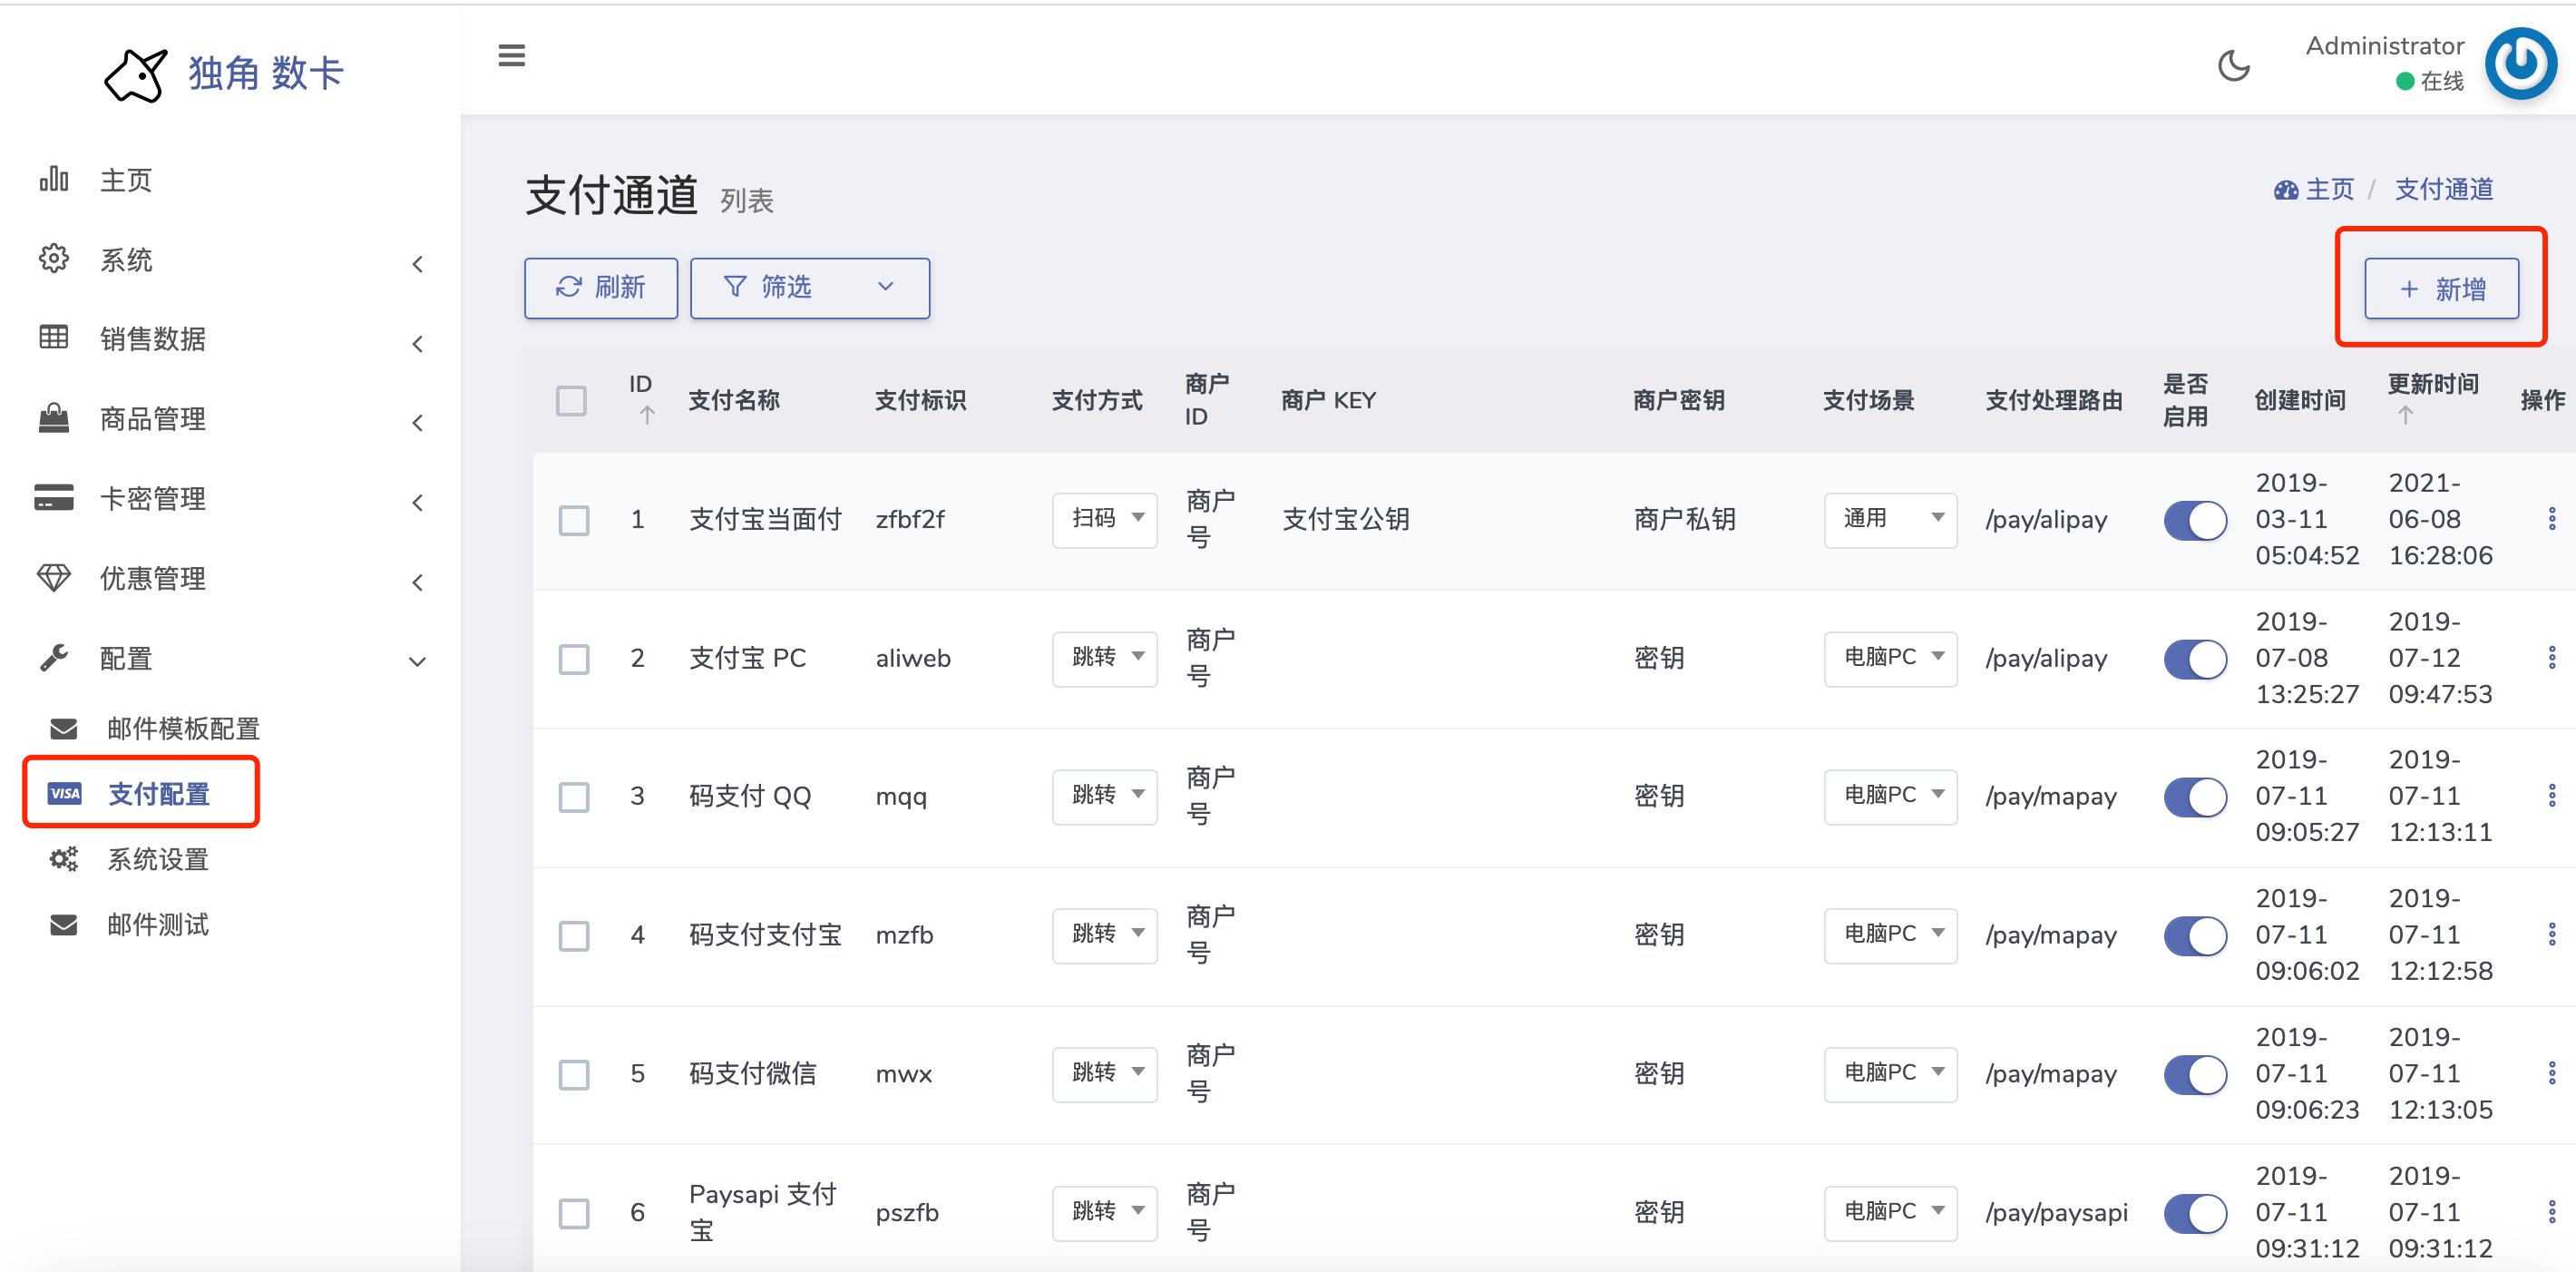
Configure according to the "Parameter Description" & "Reference Screenshot". 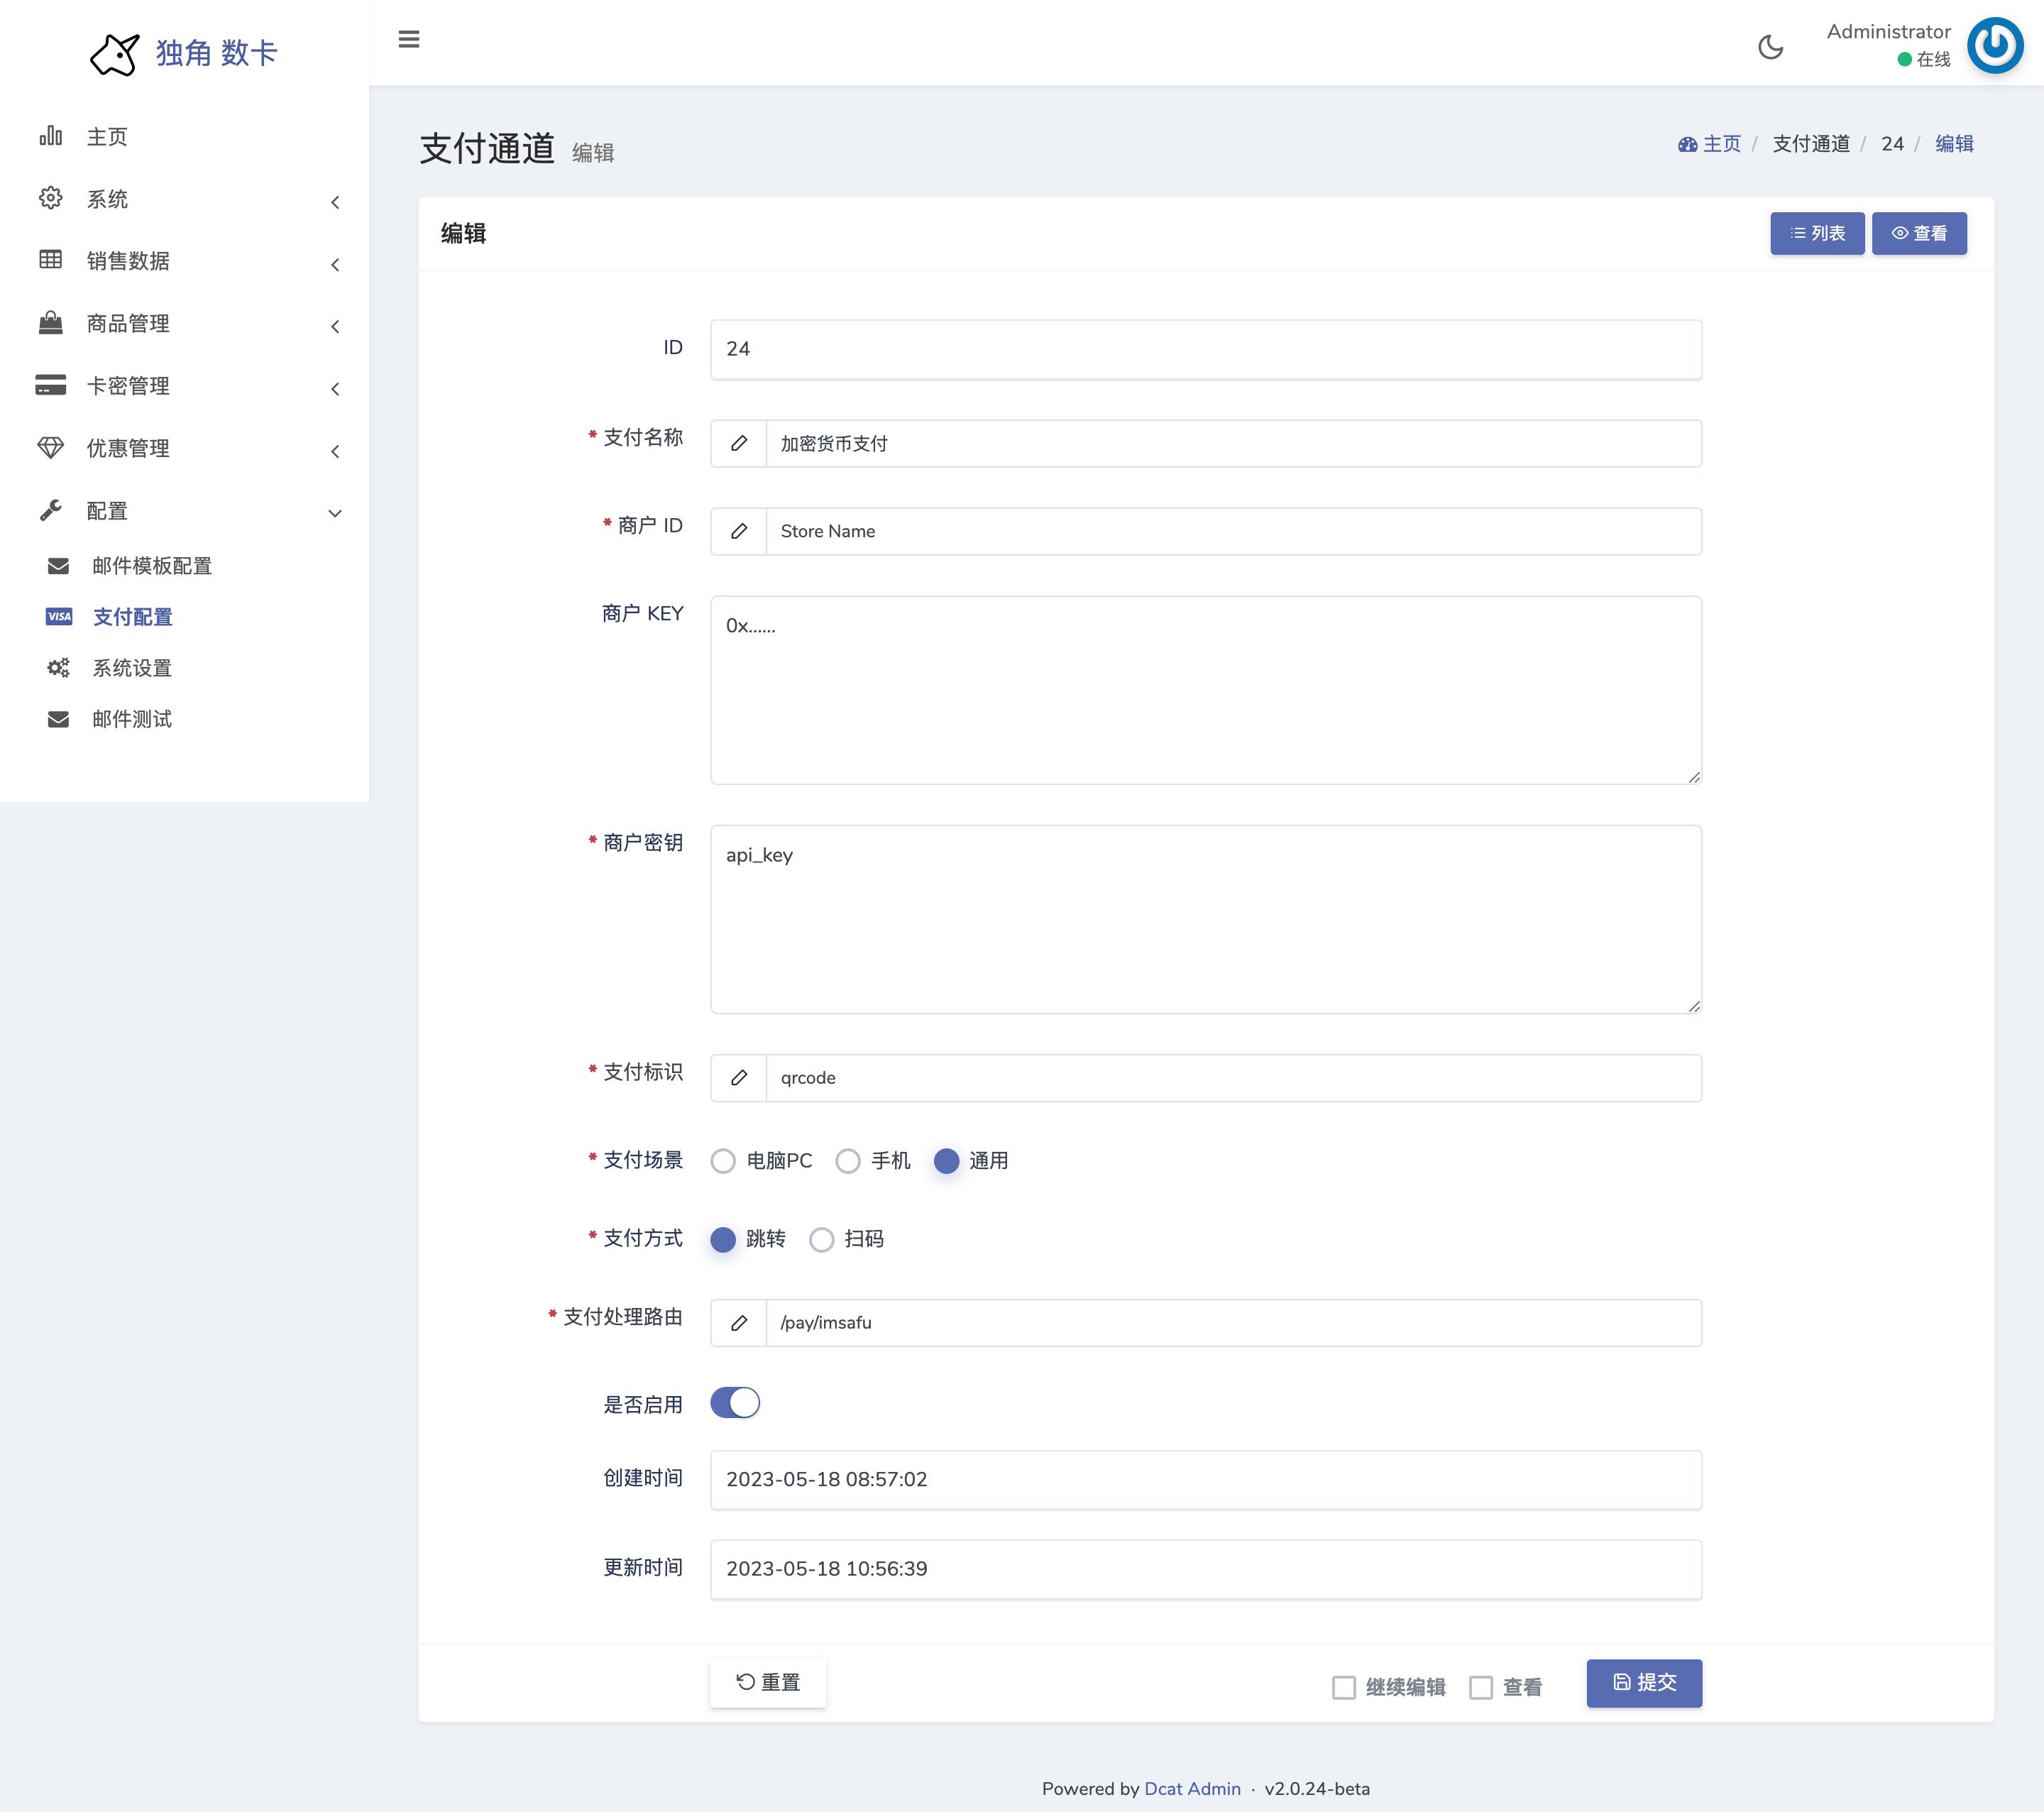
Parameter Description:
Payment Name: The name of the payment plugin.Merchant ID: Used to display the merchant name on the payment platform.Merchant Key: Used to fill in the wallet address that receives the cryptocurrency. You can use a wallet address or a deposit address of an exchange.Merchant Secret: Please go to imsafu official website and click on "Join Waitlist" to fill out the form to apply for an API Key. (This field can be left blank if Test Mode is enabled)Payment Identifier: Fill inqrcode.Payment Scene: SelectGeneral.Payment Method: SelectRedirect.Payment Processing Route: Fill in/pay/imsafu.
Test Mode Explanation
- Modify the
$is_testmodevariable inImsafuController.phpto control the enablement/disabling of Test Mode. - In the case of
Test Modeenabled, there is no need to fill in theAPI Key. - To obtain test coins: USDC Official Faucet.
- Please note that
Test Modeshould not be enabled in a production environment.